How to load (many) raster layers on QGIS 3.18 by batch process and alter their symbology together
A simple tutorial with Python code and snippets provided
Fellow researchers and open-source GIS enthusiasts,
Welcome to my blog!
I’d like to start with a disclaimer – I may be a researcher of this very area but that doesn’t mean everything I do or write here will work for you, in your own desktop configurations and package versions. I have no responsibility if you lose data or mess up your installation. I also do not authorize any copies of my content (except for the code snippets provided, for it, the MIT license applies).
Today, I am going to write about the batch processing of loading and altering the symbology of a big group of raster layers on QGIS. This tutorial was made on QGIS 3.18 Zürich, using its Python Console to load the layers.
Sometimes, opening many raster layers can be a tedious task. Maybe you have a bunch of granules from a satellite you must check before merging, maybe you are working with such a large area that you need parts of your project in different UTM Fuses, or you have 80 raster bands of the same location saved separately but you will need to use them all at once. I find opening more than ~20 files at a time a boring experience.
In fact, opening my files one-by-one was so tedious that I decided to code a little script in order to open them all. You can too!
Actually, I am providing my code to you so you can alter it to suit your needs.
So, let’s do it! Shall we begin?
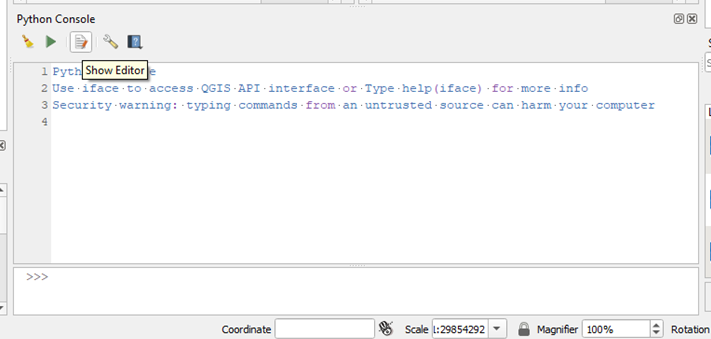
Open QGIS and Open the Python Console, under Plugins in the menu.

Click in “Show Editor”
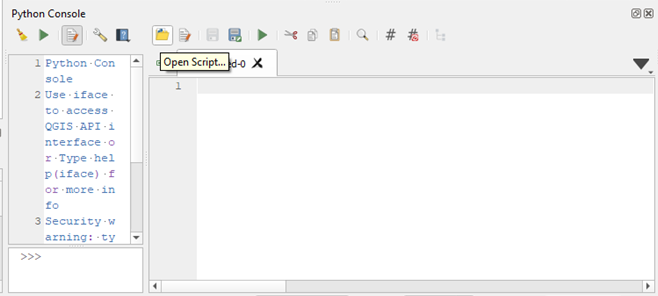
Open the Python script
Click in “Open Script” and open my script or copy and paste it in a text file, saving as your_preferred_name.py, but follow the MIT License (provided in file).
The Python gist, at GitHub:
First, I put the base folder in “caminho_base” variable (base_path). Add the part of the path to your files which does not change from file to file.
“MAX_ARQ” is the number of files you want to open at your batch processing. If you don’t have this number, you can still open the files, but it’s going to need a more elaborate way. Check the extras.
I do the range of my for loop based on 1 and the number of files plus one, because the usual Python loop starts at zero. Then, I transform my digits (integer numbers) to strings. This is useful if the name of the files has the number of the number of the raster you want to open. Example: raster_1.tif, raster_2.tif …
num_1dig is the string with a minimum of one digit (1, 2,…10,11,…99,100,101,…)
num_2dig is the string with a minimum of two digits (01, 02,…10,11,…99,100,101,…)
num_3dig is the string with a minimum of three digits (001, 002,…010,011,…099,100,101,…)
Alter the code to suit your needs
In “caminho_arquivo” (path to the file), you should put the logic which comprises the name of the files you wish to open. Common cases + code snippets below:
Case 1. Each file is in a different folder, and the folders are named “folder_01”, “folder_02”, etc. The files all have the same name “raster.tif”.
caminho_arquivo = caminho_base + ‘folder_’ + num_2dig + ‘/’ + ‘raster.tif’
Case 2. Each file is in a different folder, the folders are named “folder_01”, “folder_02”, etc. The files are named “raster_001.tif”, “raster_002.tif”, one in each folder.
caminho_arquivo = caminho_base + ‘folder_’ + num_2dig + ‘/’ + ‘raster_’ + num_3dig + ‘.tif’
Case 3. Each folder has two files. The folders are named “folder_01”, “folder_02”, etc. The files are named “raster_01.tif” and “raster_02.tif” in folder_01, … “raster_51.tif” and “raster_52.tif” on folder_25.
import math # add on the beginning of the .py file
num_div2=math.floor(i/2)
num_div2_str_2dig=str(num_div2).zfill(2)
caminho_arquivo = caminho_base + ‘folder_’ + num_div2_str_2dig + ‘/’ + ‘raster_’ + num_2dig + ‘.tif’
Case 4. Each folder has two files. The folders are named “folder_01”, “folder_02”, etc. The files are named “raster_01.tif” and “raster_02.tif” in folder_01, … “raster_01.tif” and “raster_02.tif” on folder_25. They are always named “raster_01.tif” and “raster_02.tif”.
Replace MAX_ARQ by half the number of total files. Put the total number of folders instead.
Copy everything from “caminho_arquivo” down and make one version for “raster_01.tif” and another for “raster_02.tif”, both can be based on the snippet shown for Case 1.
Case 5. The rasters are all on the same folder, it’s the file name that changes.
caminho_arquivo = caminho_base + ‘folder/’ + ‘raster_’ + num_2dig+ ‘.tif’
Case 6. The rasters are in different folders and folder names are given by date, not by number.
Well, this is one of the hardest. First, get the starting and end dates in strings. If you don’t have the end date, no problem, just use this snippet I coded to get your end date:
from datetime import date #add to the beginning
from datetime import datetime #add to the beginning
startyear=1970
startmonth=1
startday=1
date_start=date.toordinal(date(startyear,startmonth,startday))
date_end=date_start+MAX_ARQ
end_datetime=date.fromordinal(date_end)
endyear = end_datetime.strftime("%Y")
endmonth = end_datetime.strftime("%m")
endday = end_datetime.strftime("%d")
You’ll not only need the start and end dates, you’ll need everything in between. In this case, date_end will not be the end date, but the loop_date.
from datetime import date #add to the beginning
from datetime import datetime #add to the beginning
startyear=1970 # before the loop
startmonth=1 # before the loop
startday=1 # before the loop
date_start=date.toordinal(date(startyear,startmonth,startday)) # before the loop
date_loop=date_start+i
loop_datetime=date.fromordinal(date_loop)
year = loop_datetime.strftime("%Y")
month = loop_datetime.strftime("%m")
day = loop_datetime.strftime("%d")
Now, build the name of your folder.
caminho_arquivo = caminho_base + year+ ’-’ + month + ‘-’ + day + ’/’ + ‘raster.tif’
or…
caminho_arquivo = caminho_base + year+ ’_’ + month + ‘_’ + day + ’/’ + ‘raster.tif’
Other options are possible.
I built a version of the code with the dates, which you can use as a base for your code:
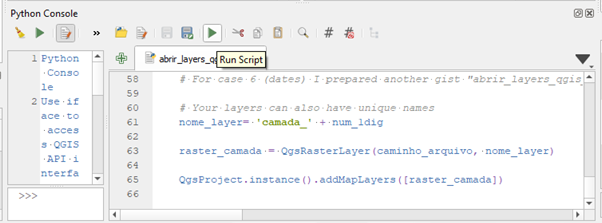
Another thing you can alter is the name of the layer on QGIS. You can choose whatever you want, but I suggest including the loop iteration so you know which layer is which.
nome_layer= 'camada_' + num_1dig
After you successfully altered the paths to suit your needs, run the script to start the loading batch process
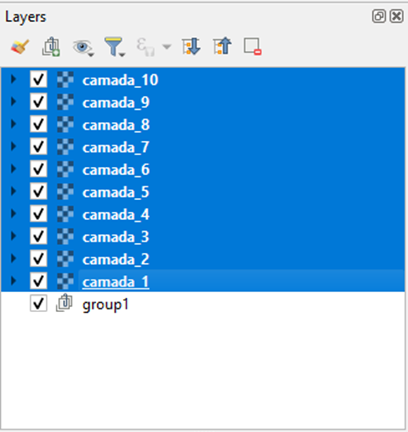
After running the script, the layers should be loaded
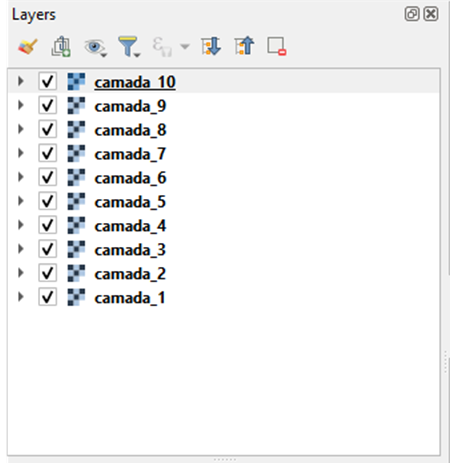
Great!
Symbology in batch
Now, how can I apply the same style to all of them without having to change each one separately (again, very tedious!)
It’s pretty simple, actually. No Python involved, this time!
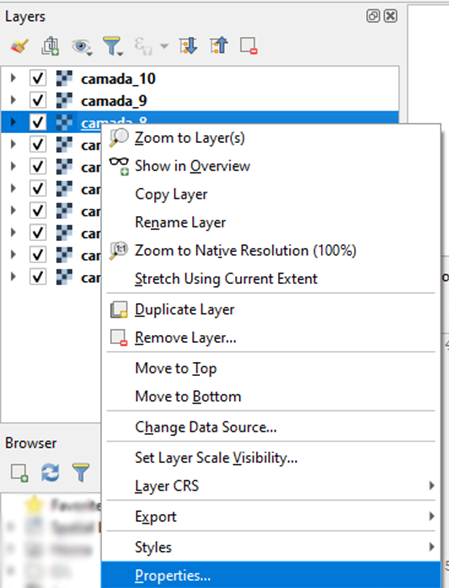
Open the Properties of one of your layers, and go to Symbology tab
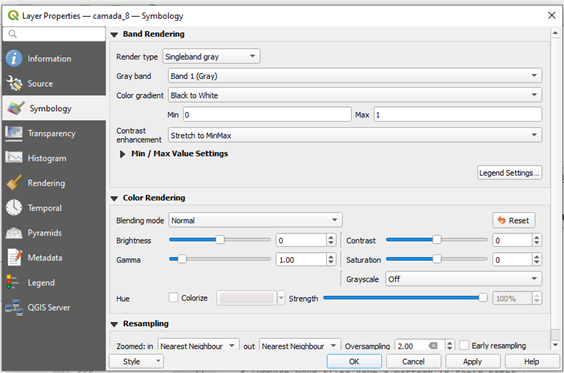
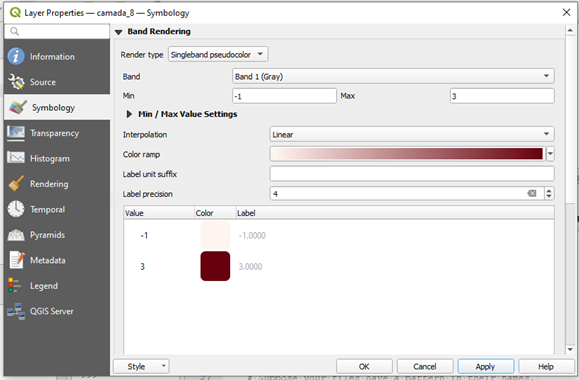
Adjust the symbology at your will
Click Apply and then OK
Create a new layer group
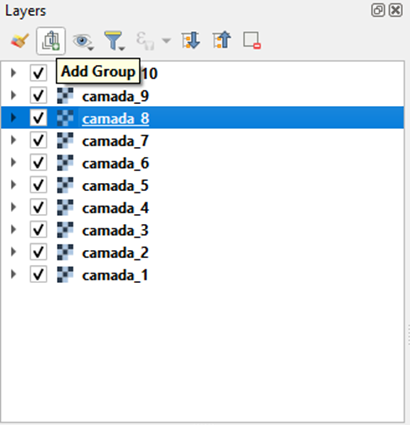

Select all of your layers by clicking the first one and holding Shift and clicking the last one, and then drag them to the layer group, so that they become part of the layer group you just created.

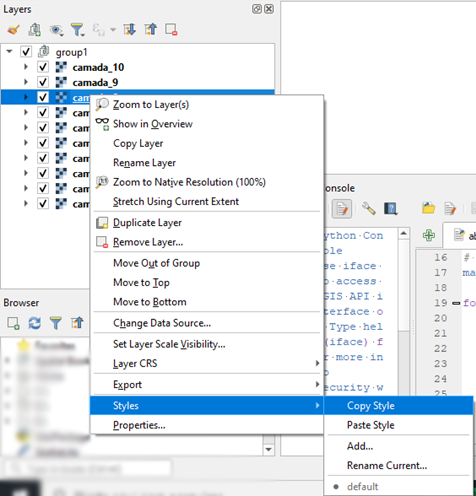
Copy the style of the layer
Right-click that layer that you adjusted the symbology and choose Styles, Copy Style.
At this point, if you paste the copied style in a text editor (you don’t have to do that, I am just telling you what is in this), you should see something like a XML file, if you’ve seen one.
Paste the style to the group of layers
Now, paste the style it to the group. To do so, right click the group and click “Paste Style”.
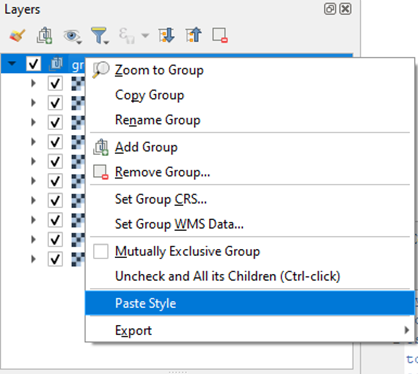
All layers should have the chosen style now.
I think it’s done!
Extras:
- I have so many files I don’t even know how many of them I have. I don’t have numbers, only a list with their names.
A list with their names may be all you need. You just need to copy this list to the Python code and declare it as a list. Then, do the for loop in your list. Example:
file_list = ['rasterXYN.tif', 'anotherraster.tif', 'thirdraster.tif', 'OKraster.tif', 'Nice_raster.tif']
for item in file_list:
	…
- Why don’t you simply merge all the files in a mosaic? then you won’t have to open all these files anymore.
There is a ton of reasons someone may not want to mosaic their rasters into a single one. Main reasons include: they are in different projected coordinates, such as different UTM fuses, they would generate a file that is too large, they are in the same location in space, but different bands or times.
- Simply add them all once and then save the project, you won’t have to worry about them anymore!
Sorry, if you constantly change your workstation or work in different computers, that doesn’t work, and you would still have to specify the location of the rasters.
Also, in some cases, even opening all the files once is wasting too much time. Imagine the case you have a thousand rasters. If you are really quick you can load each in 20 seconds. It would still take 5.56 hours to open the whole dataset. By the same logic, if you have a hundred files, opening all of them would take about half an hour, which I already think it’s too much, considering reading this whole post takes about 8 minutes!
- I have more than a thousand rasters, how am I supposed to select and drag them all to a group? Isn’t there a simpler way?
Yes, you can first create the group, select the group, and while it is selected, run the code to load the rasters. They should appear already inside the layer group.
- I have many layers to load, but they are vectors! Does this procedure only work for rasters?
Yes, but it can be adapted to load vector shapefiles and geopackages. I plan on adapting it to vectors. When I do so, I’ll be editing this post to add the code.
Luísa Vieira Lucchese
Research Assistant Professor
Research Assistant Professor at University of Pittsburgh