How to open, edit and save raster files (.tif) using Python
Fellow researchers and open-source GIS enthusiasts,
Welcome to my blog!
I’d like to start with a disclaimer – I may be a researcher of this very area but that doesn’t mean everything I do or write here will work for you, in your own desktop configurations and package versions. I have no responsibility if you lose data or mess up your installation. I also do not authorize any copies of my content.
Today, I am going to write about how to open, edit and save raster files using Python if you are familiarized with Python (mainly Anaconda).
Maybe you need to run every pixel in a raster through a Python function, or you want to do custom operations with them that are not available on GUI software such as QGIS. It also can be used to do batch processing. I showed another way to do batch processing here.
We are going to use GDAL on Python, installed through Conda, to do this.
How to do it
First thing you will need to do: install GDAL on Python using Anaconda
conda install gdal
I read it can be installed using pip as well, but have not tried it:
pip install gdal
and then load the package gdal from osgeo on your Python console or script. I use Anaconda Spyder.
from osgeo import gdal
Knowing the location of your raster to be opened, you can open it using the command:
step1 = gdal.Open('path_of_the_file.tif', gdal.GA_ReadOnly)
for opening the raster read-only and saving it on step1 variable.
Copy the transformation to a variable, it will be useful later.
GT_input = step1.GetGeoTransform()
Read the bands of your raster using GetRasterBand
step2 = step1.GetRasterBand(1)
Transform the read band into an array, to work with it.
img_as_array = step2.ReadAsArray()
Read the size of your array
size1,size2=img_as_array.shape
Create the output to be saved with the same dimensions
import numpy as np
output=np.zeros(shape=(size1,size2))
Do the processing you need to and save it to the output variable. Example, the whole raster to the power of 1.2:
for i in range(0,size1):
    for j in range(0,size2):
        output[i,j]=img_as_array[i,j] ** 1.2
Then, we will export the output variable into a file using rasterio.
import rasterio
You may need to install rasterio by using:
conda install -c conda-forge rasterio
Create a variable with the projection of your raster. Example:
dst_crs='EPSG:32722'
Transform your output to a float
output = np.float32(output)
And finally, write the variable output to your file
with rasterio.open(
    'output_map.tif',
    'w',
    driver='GTiff',
    height=output.shape[0],
    width=output.shape[1],
    count=1,
    dtype=np.float32,
    crs=dst_crs,
    transform=GT_input,
) as dest_file:
    dest_file.write(output, 1)
dest_file.close()
This example saves an output called output_map.tif
Example with a random raster
I generated a random raster by binomial distribution on QGIS 3.18, with values between 0 and 10. The actual range of the generated raster was [2,7].

After running the code on Python, the following raster was generated:
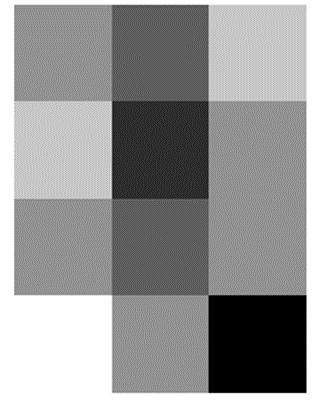
It looks the same, but the range has changed:
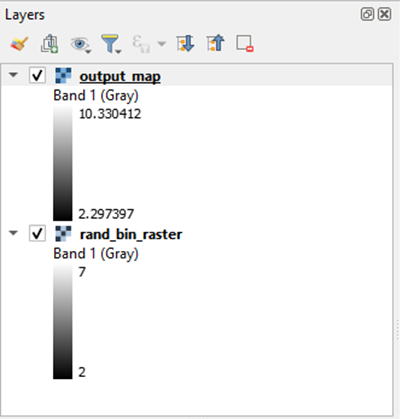 Showing that the code worked!
Edit (August 2nd, 2021): if you are having issues with GDAL-style transforms in rasterio, there is a quick solve for it. Check out this post.
Edit (March 21st, 2023): I wrote a post about saving raster files using GDAL on Python. It might be useful for someone who does not want to use both rasterio and GDAL to open and save raster files when using Python.
Luísa Vieira Lucchese
Research Assistant Professor
Research Assistant Professor at University of Pittsburgh